Guide to Soldering Techniques
The soldering process varies based on the components being soldered and the specific technique used, but the core of the procedure is largely the same. The goal is to heat up and apply solder — a metal alloy with a low melting point — that is used like glue to bond electronic components to the PCB. Once the solder cools, it re-hardens into a solid, connecting the parts permanently.
There are multiple soldering techniques you can use when working with printed circuit boards (PCBs). This guide provides a general overview of hand soldering procedures and other soldering types and techniques to help you get started.
The Hand Soldering Process
Hand-soldering is one of the most fundamental skills to learn in electronics. Hand soldering PCBs is usually the last step in the assembly process for prototypes and is used to finish out details for through-holes and surface mounted components. Hand soldering can be a tricky skill to learn as it requires a breadth of knowledge and practice to master. Below is a basic hand soldering tutorial:
- Prepare your surface: Before the soldering process, it’s essential to prepare your iron and surface. Always start a hand soldering procedure with a clean work surface and clear away dust and debris that may interfere with your solder. Set up your iron stand where it is easy to reach from your bench. The iron should always return to the stand when not in use.
- Prepare your iron: Before starting the solder process, you should prepare your iron with a process known as tinning, which coats the tip of the iron in solder to help with the heat transfer process. You can do this by warming up the iron to full heat — it usually takes a few minutes for the iron to reach the normal operating temperature of 400°C. Once the iron is hot, cover the tip completely with solder. When the tip is coated, wipe it off with a wet sponge to remove excess residue before the flux has time to solidify.
- Place the components: Hand soldering is usually needed for one or two components at a time, unless you’re working with a complex board. To avoid complications, place the smaller pieces first, then work up to the larger ones to keep the board flat and balanced. For through hole components you can bend the leads as needed to insert the component so it will stay in place once you stop holding it.
- Apply flux: Apply flux to the PCB and component lead at the solder joint. Flux aids in the heat transfer and cleans the metal surface during heating to create a stronger bond. It will result in a smoother and more uniform solder joint.
- Apply heat: Add a very small amount of solder to the tip of the iron to help with heat conduction, then apply the tip of the iron so it touches the board and the component lead simultaneously. This applies heat to both parts and prepares them for soldering. Apply heat for a few moments before moving on to the next step. Be sure to remove the iron immediately if the area starts to bubble, as this indicates overheating.
- Add solder to the joint: With the iron still touching the area, apply the solder to the joint. Touch the tip of a strand of solder to the lead until the solder liquefies and flows freely. Continue adding solder around the joint until it is coated and the solder forms a small mound. At this point, remove the solder and the iron from the area. Make sure not to jostle the board as you remove the solder and iron so everything stays in place.
- Finish: Wait until the joint has finished cooling, then inspect it. If the joint looks good, move on to the next solder joint and repeat steps three through six.
Make sure to clean up after each soldering session by removing extra flux from the board and clearing the work surface.
Additional Soldering Techniques
While the steps above serve as a basic hand soldering tutorial, there are many types of soldering techniques that are used in specific circumstances. The primary types of PCB soldering include:
- Lead-based soldering: It’s important to note that most traditional solder is a metal alloy of tin and lead, which is designed to melt at a low temperature. Lead-based solder consists of about 63% tin and 37% lead. Lead-based solder is easy to use and provides a quality finish on PCBs. When working with lead-based solder, it’s important to wash your hands before and after use, and dispose of any solder waste in a designated lead waste container that can be taken to an appropriate disposal site.
- Lead-free soldering: In 2006, the EU restricted the use of leaded solder in electronics, making lead-free soldering the new norm in electronics manufacturing. Lead-free solder can be handled using a traditional iron, but it requires higher soldering iron temperatures. It takes some adjustment to use, as it can be more difficult to spread. Using lead-free solder also requires more careful iron maintenance since higher heat results in quicker oxidation and can reduce the life of a solder tip. It’s important to note that lead-free solder joints are more likely to cause solder bridges and tin whiskers.
- Through-hole soldering: Through-hole technology is where an electronic component has a lead that is inserted into holes drilled in a PCB. The lead is then soldered on the opposite side of the board. Through-hole hand soldering is one of the primary techniques to master. The ideal solder joint for through-hole soldering looks similar to the peak of a chocolate chip when finished.
- Drag soldering: Drag soldering is another hand soldering technique used for surface mounted components. This works by dragging solder across the leads, quickly soldering an entire row of component leads. This method is quick and relatively easy to learn, but requires good technique and conducive board design. Applying flux to the component leads is critical to allow the solder to flow across the leads easily.
- Miniwave soldering: Miniwave soldering is a miniaturized variation of wave soldering, where a circuit board populated with components is placed in flowing solder to selectively solder components. Miniwave soldering applies this same technique one component at a time. This is an automated technique and has the benefit of being easily reproducible. The solder joint is also very high-quality.
While these techniques can all be good to know and pose various benefits, it is typically recommended to practice basic hand soldering techniques before moving on to different methods and materials.
Things to Avoid When Soldering
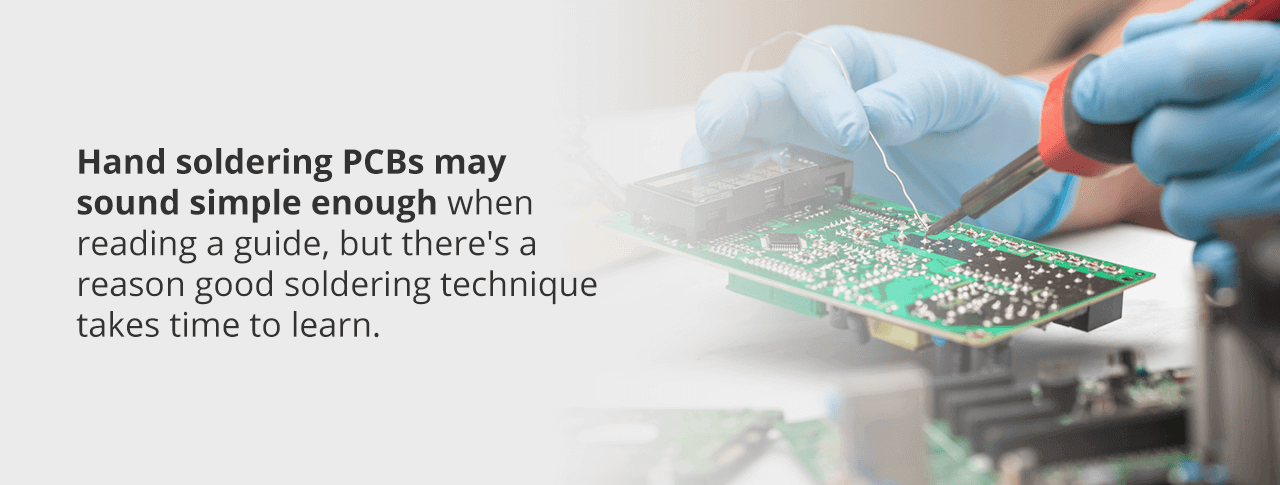
Hand soldering PCBs may sound simple enough when reading a guide, but there’s a reason good soldering technique takes time to learn. There are many ways hand soldering can turn out wrong. Common problems encountered during the soldering process include the following:
- Solder bridging: Solder bridges form when two points on a PCB are connected inadvertently during the soldering process, resulting in a short circuit. This usually occurs due to excessive application of solder or the use of a soldering tip that is too wide for the application.
- Excessive solder: If you apply too much solder to a pin, it may result in a raised, rounded shape known as excess solder. This looks bad, wastes solder and increases the chances of forming a solder bridge.
- Solder balling: Solder balls are small spheres of solder adhered to the laminate or conductor surface. This usually occurs due to excess moisture or incorrect settings during the wave soldering process. Solder balling may result in solder adhering to the wrong side of the board.
- Cold joint: A cold joint is a dull, lumpy joint with poor conductivity that is the result of insufficient heat being applied to the joint. This usually happens because the iron was not allowed to reach operating temperature, or the joint was not heated enough before the solder was applied. It also happens with lead-free solder due to the higher melting point of this solder type.
- Overheated joint: Overheated joints are characterized by rough surfaces, burned laminate or white solder. This often occurs because the iron was set too high or was applied to the board for too long. Overheated joints can cause the pad to lift, destroying the board.
- Tombstoning: Tombstoning occurs when a surface mount component lifts to one side from the board. This usually happens because the solder on one side did not completely wet before application and had poor adhesion. This can be fixed by ensuring that both pads are wet before applying the surface-mount technology (SMT).
- Solder skip: A solder joint that is not wetted with solder is a solder skip. This happens when the solder is not applied to a surface mount, resulting in an open circuit that doesn’t work properly.
Tips for Hand Soldering Electronics
Below are a few tips for hand soldering to help maximize your efficiency and safety while reducing soldering errors:
- Organize components: It’s easy to lose track of or misplace components when you’re focusing on the solder process. Keep track of components on your workspace by sticking them onto a sheet of paper using sticky tape and labeling each.
- Maintain the iron: Poor iron tip maintenance is one of the primary causes of poorly-soldered joints. Contamination and oxidation decrease the iron’s ability to conduct heat, resulting in lower-quality solder joints. Be sure to clean and tin the tip of the iron before use, after every two to three joints soldered and at the end of the soldering session.
- Handle the iron properly: When using a soldering iron, always hold it like a pen near the base of the handle. Never touch the hot element or tip. Also be sure to return the iron to the stand when not in use — never set it on the workspace or bench.
- Work in a well-ventilated area: The smoke and fumes formed when melting solder is mostly from the flux. No matter what type of solder you use, the fumes formed can be very irritating to the eyes and lungs. Always work in a well-ventilated area and do not hold your head directly above your work.
- Wash your hands: Traditional solder contains lead, which is a poisonous metal. Always be sure to wash your hands thoroughly after using solder and do not touch your face while working to avoid ingestion or absorption.
- Practice: The best way to improve the quality of your solder joints is to practice. Hand soldering electronics is a skill that requires training and repetition. It takes time to figure out your preferred techniques, including your timing and grip.
In addition to these methods, getting quality guidance and hand soldering training can give you the resources and tips you need to master soldering techniques. If you’re looking for quality PCB soldering training, Precision PCB Services can help.
Choose Training From Precision PCB Services
Precision PCB Services offers soldering training seminars that allow beginners and experienced electronics professionals to dive into the world of soldering. These seminars feature hands-on training in assembly, re-working and soldering. Whether you want to advance your hobby skills or improve your potential for job advancements, this training can help.
Our training poses an advantage for employers as well. We offer employee training and certification options that follow IPC guidelines, with courses on surface mount and through-hole hand solder training, component rework skills and other techniques. Our seminars assess practical skills and performance levels and have multiple language options available.
At Precision PCB Services, we leverage our 25 years of industry experience to provide quality service, unbeatable products and top-notch training, enabling our customers to gain the tools and knowledge they need to succeed. Contact us today to learn more about our hand soldering training options.


